We are often asked how to prepare an interactive floor.
Many people know it’s a projection-based system that requires a projector and a motion detector.
However, not everyone understands what exactly this "motion detector" means.
Let’s explain it in this post.
💡 This article is a summary of a broader explanation available in our Help Center under the Motioncube interactive projection section.
What Is a Motion Detector?
In the case of an interactive floor, the motion detector is a camera — a device that “sees” the interaction space. However, it cannot be a regular webcam, which is where many people get stuck.
To work properly, a camera used in an interactive floor must meet two key requirements:
- It must not see what the projector displays.
- It must see the floor space consistently, regardless of external lighting conditions.
There are at least two types of cameras that meet these criteria:
- 🎥 Infrared 2D cameras — they capture only infrared light (so they don’t see the projected image). These cameras can detect movement but not distance.
- 📡 Depth cameras (2.5D) — they detect the distance between the camera and the floor, allowing more accurate motion tracking.
3 Installation Scenarios with Motioncube
Below are three practical ways to build an interactive floor using Motioncube software.
1️⃣ Depth Camera
This is the simplest approach, allowing you to build a working installation using commonly available components.
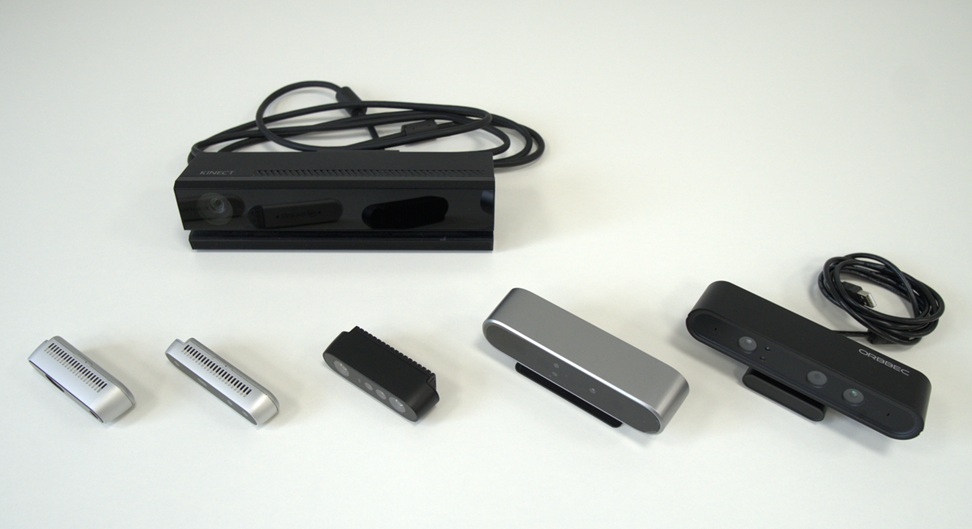
You can use Depth Sensor to build interactive floor
📦 You only need to:
- choose one of the supported depth camera models (see the list of compatible cameras on the Motioncube website),
- mount it on the ceiling or high on a wall so that it captures the full projection area,
- perform the Motioncube calibration.
That’s all — your setup is ready!
✅ Advantages:
- easy availability of devices,
- simple installation and configuration.
⚠️ Disadvantages:
- higher device cost,
- may be unstable operation for the range close to the floor (2-5 cm),
- some models require recalibration after restart (Motioncube compensates for this automatically).
💡 Typical Use:
- Prototype and small-scale installations.
2️⃣ CCTV Camera with Integrated IR Illuminator
This is a classic and well-proven solution, historically used on a large scale.
CCTV cameras have everything you need — they can see in the dark using infrared light, and their integrated IR illuminators evenly light up the floor regardless of external lighting conditions.
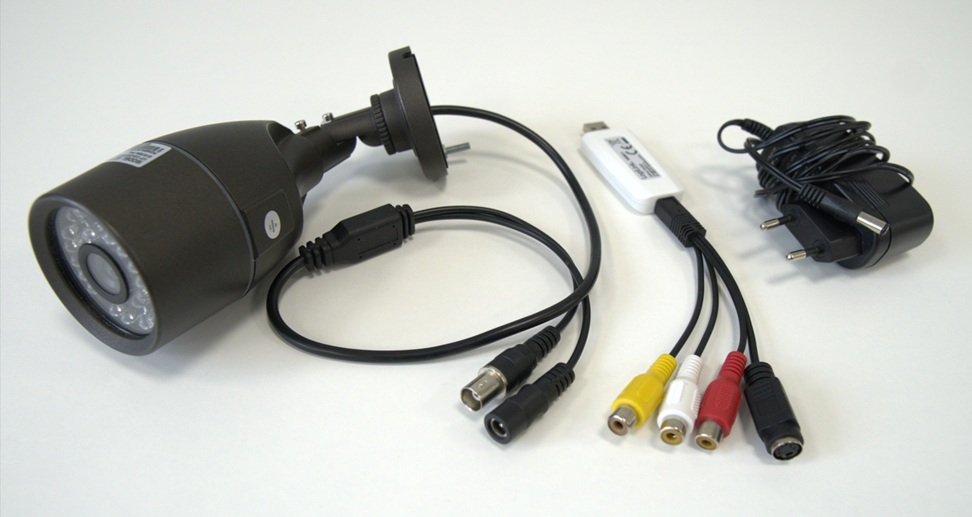
CCTV camera with integrated IR illuminator it's great for experimenting
Points to consider:
- Night mode control - IR LEDs often switch on and off automatically depending on external light levels. To keep them always on, you must either force night mode permanently in the camera settings or cover the light sensor so it doesn’t detect visible light.
- Infrared filter - In night mode, many cameras capture both visible and infrared light. A visible-light blocking filter is required.
- Connection type - CCTV cameras are usually IP or analog, not USB, so they may require a USB video grabber to connect to the computer.
✅ Advantages:
- relatively low cost,
- all elements integrated in a single device.
⚠️ Disadvantages:
- may require a USB video grabber,
- may need minor adjustments (adding an IR filter or forcing IR LEDs to stay on).
💡 Typical Use:
- Prototype and small-scale installations.
3️⃣ USB Camera + External IR Illuminator
This setup is a variation of the previous one, using separate components — a USB camera and an infrared illuminator. It provides great flexibility and high stability.
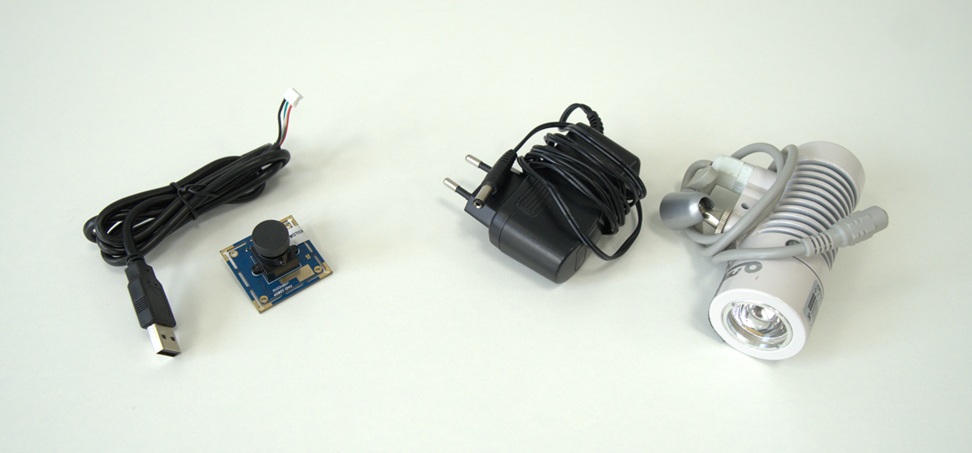
USB IR Camera with external IR illuminator is always good choice
🔦 Component selection:
1. IR Illuminator:
- choose a model with a beam angle of at least 120°,
- ensure it supports permanent night mode (LEDs always on).
2. USB Camera:
- preferably a board camera with interchangeable lenses,
- use a lens with a visible-light blocking filter, allowing IR light (850 nm) to pass through.
You can find such components in electronics stores.
This setup provides a stable and reliable foundation for an interactive floor installation.
✅ Advantages:
- relatively inexpensive,
- highly stable performance,
- simple connection (USB 2.0 for the camera, 12V power for the illuminator).
⚠️ Disadvantages:
- requires initial research to find compatible components.
💡 Typical Use:
- Mass-production and multi-unit installations.
Additional Notes
There are also other technologies you can experiment with to achieve an interactive floor effect — such as LiDAR sensors or LED displays with built-in detectors. These are not currently supported by Motioncube.
However, if you plan to use such hardware in a large-scale or serial production setup, contact us — we’ll analyze the possibility of adding support for those sensors.
What Won’t Work
❌ Standard webcams are not suitable for building an interactive floor.
They lack infrared illumination to operate in dark environments and also capture visible light — including the projector image — which would cause interference and unstable interaction.
Summary
If possible, experiment with different approaches and choose the one that best suits your setup.
Motioncube includes complete calibration tools for all the scenarios described above, so don’t hesitate to test and explore.
🔧 Try Motioncube and see how easy it is to build your own interactive floor. Start from Download Player and Create Account.
