Interactive Card Table
Add an augmented-reality card table to your portfolio – no in-house software development required. Players use real printed code cards on a projected game board, blending tangible play with digital feedback. We provide the software, card sets, technical support and marketing assets.
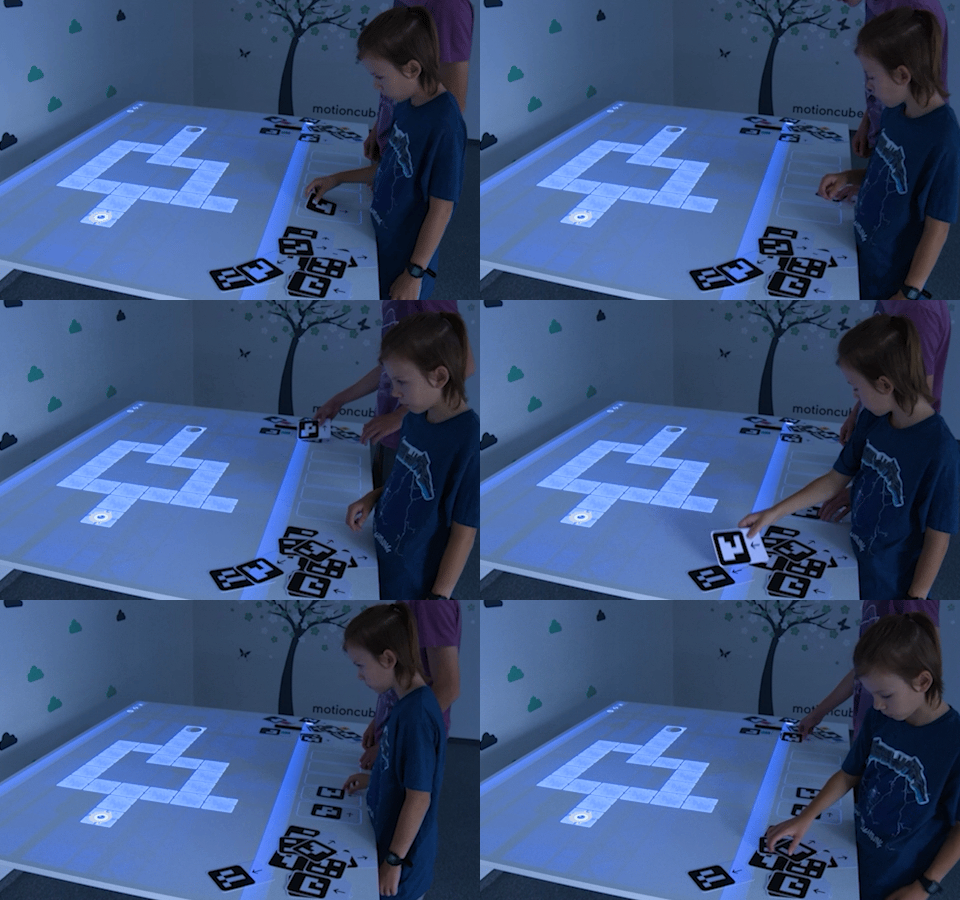
Projection on the table
Game board projected onto the tabletop
Real code cards
Printed cardboard tiles with QR codes
Augmented reality
Physical cards, virtual visualisation
Learn to code
110 levels teaching algorithms & logic
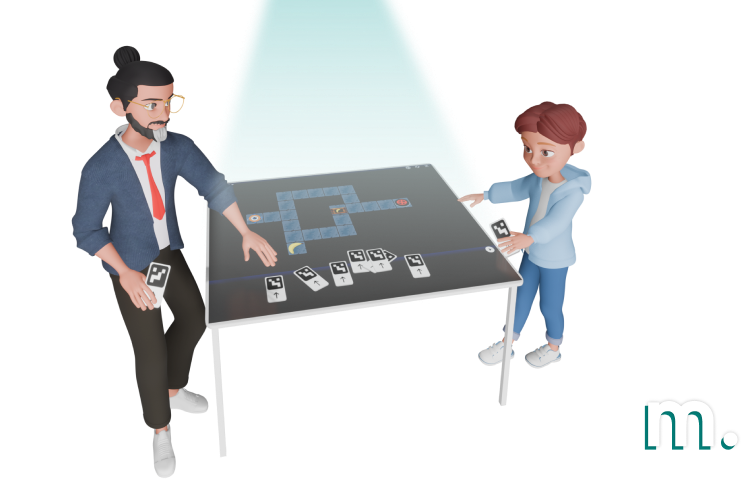
Deployment Location
Classrooms, school common rooms, libraries, STEM labs, coding clubs, science centres, therapy rooms, family entertainment centres.
Target User Group
Children aged 7–14, students learning to code, educators and therapists. Groups of 1–4 players.
Use Scenarios
Coding education with tangible cards, algorithmic thinking workshops, STEM lessons, hand–eye coordination training, inclusive education and rehabilitation activities.
Interaction Method
Printed cardboard tiles placed on the projected game board — the camera reads the QR code sequence and the virtual hero executes the code.
Interaction Surface
Tabletop with projected image. Works on white to brown coloured tables.
Content included:
Go Lumi! Magic Cards
The core of this solution is Go Lumi! Magic Cards — an augmented-reality coding game with 110 levels. Players arrange real printed code cards on the projected game board to create instruction sequences for a virtual hero named Lumi.
The game covers navigation, collecting & sorting objects, conditional fields, loops and functions. It comes with 53 printed code tiles and a logical division into 11 lessons with ready-to-use class scenarios.
The game works with Motioncube Player in Interactive Table Mode (version 2.7.4+). Two game modes are available: Real mode (printed cards) and Virtual mode (IR pen on the table).
See in store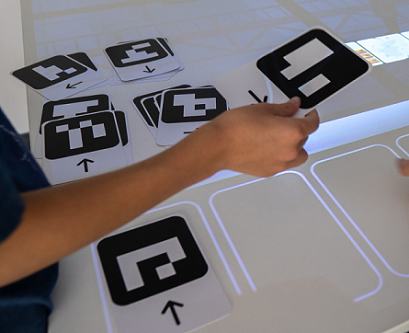
How augmented reality works on the table
The system combines a physical card game with digital visualisation. Players place real cards on the table and the projected game board reacts in real time — creating a true augmented-reality experience.
Analyse the board
The game board is projected onto the table. Players study the level, identify obstacles and plan their moves.
Arrange code cards
Select cards from the deck and place them in the displayed frames on the table in the correct order to create a code sequence.
Camera reads the code
Press Play — the camera reads the QR codes on the cards and interprets the instruction sequence.
Lumi comes to life
The virtual hero Lumi moves on the projected board according to the planned instructions, collecting items and completing missions.
How to build an interactive card table
Mount a projector and camera above the table, connect them to a mini PC running Motioncube Player, and switch to Interactive Table Mode. The system calibrates automatically for card tile detection.
Mount hardware
Install the projector and camera above the table using a ceiling mount or mobile stand.
Connect & install
Connect both to a mini PC. Install Motioncube Player (v2.7.4+) and activate Interactive Table Mode.
Calibrate
The system auto-calibrates the projection area for precise card tile detection on the tabletop.
Play with cards
Launch Go Lumi! Magic Cards. Hand out the printed code tiles and let players arrange them on the projected game board.
Step-by-step setup
See how to set up and calibrate the projection on a regular table — the same configuration serves both the printed card mode and the IR pen mode.
Short throw projector on a tripod · Orbbec Astra 2 on a tripod · table or floor surface · mini PC with Windows · Motioncube Player (Beam)
Choose the game mode
The game supports two interaction modes on the table, so you can adapt the experience to your audience and hardware setup.
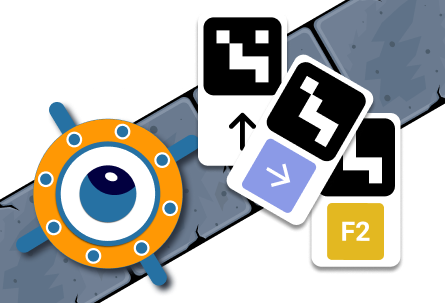
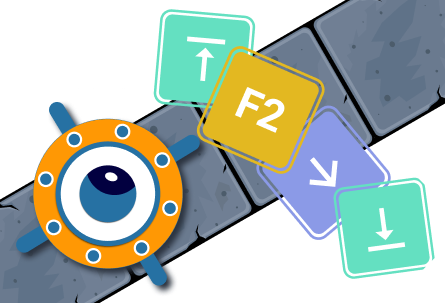
Real Mode
Create code sequences from real printed instruction cards. Select cards from a deck and place them in the displayed frames on the table in the correct order. The camera reads the QR codes and executes the code.
Virtual Mode
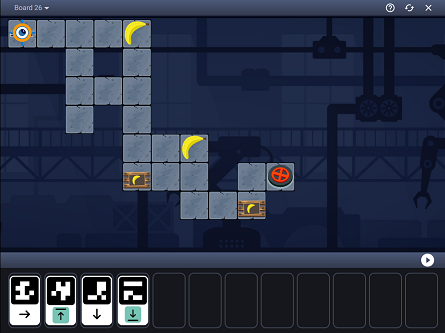
Create code sequences from displayed image blocks. Use the IR pen to select blocks and arrange them in the correct order — no physical cards needed.
Active support for student development
Working with Go Lumi! Magic Cards develops a wide range of skills essential for modern education:
- Computational thinking
- Algorithmic sequencing
- Loops & functions
- Spatial orientation
- Pattern recognition
- Teamwork & cooperation
- Eye-hand coordination
- Cause-and-effect thinking
- Attention & focus
- Classification skills
What's included?
Motioncube Player
Software for configuring and running interactive projections. Includes Interactive Table Mode and TILES interaction for card recognition.
Go Lumi! Magic Cards
110 levels of coding education with 53 printed code tiles. Navigation, loops, functions and more.
Demo License
For internal demos and client presentations.
White-label option
Add your brand to the software interface.
Lesson scenarios & materials
11 ready-to-use class scenarios introducing algorithmic concepts progressively. Perfect for educators.
Technical & marketing support
Technical documentation, direct contact with the Motioncube support team, and starter marketing assets.
Technical specification
What you need to source and how to install it — hardware, mounting conditions and licensing.
| Projector | Resolution 1280×800 or 1024×768. Brightness 3800 lm, depending on installation conditions. |
| Camera | 3D camera e.g. Orbbec Astra 2 or 2D camera with sufficient resolution for QR code reading. |
| Computer | Windows 11, Intel i3, 8 GB RAM, SSD 256 GB or compatible mini PC with USB and HDMI ports. |
| Mounting system | Ceiling mount or mobile stand above the table. |
| Code tiles set | 53 printed cardboard instruction cards included with the Go Lumi! Magic Cards application. |
| Software version | Motioncube Player 2.7.4 or newer required for tile detection and Interactive Table Mode. |
| Mounting scheme | Projector and camera are placed above the projection surface (above the table) and connected to the computer. |
| Mounting height | Minimum 1 m (39 inches) above the tabletop for the projector, depending on hardware setup and camera capabilities. |
| Device operating mode | Switch to Interactive Table Mode in the Motioncube Player menu. The projection area will be automatically calibrated for precise card tile detection. |
| Usage conditions | Use on any tabletop, from white to brown coloured tables. Avoid direct sunlight in the projection area. Ensure the table surface is flat for proper card placement. |
| Tabletop size | Depends on the resolution and mounting height of the projector. Add additional margin approx. 5 cm (2 inches) for card placement area. |
| License type | Single-station, perpetual. |
| Single installations | Are you delivering a single project and need a license for one installation? Simply purchase the required product directly from the Motioncube Store at full price. |
| Multiple deployments | Are you planning multiple deployments and need licenses for several installations? Take advantage of our integrator offer. After ordering the first five licenses, you will receive an additional presentation license free of charge, intended for use on a demo or showroom setup. |
| Additional revenue | Commission from the sale of additional content. Offer your clients extra Motioncube applications, which you can settle with us at a discounted price compared to the store price. More details are available in the integrator cooperation terms. |
Choose the right option for your project
Building a single installation? Buy the app from our store. Planning repeatable deployments? Choose an Integrator Pack with volume pricing and ready‑to‑deploy bundles.
Single installation
Purchase Go Lumi! Magic Cards from our store — ideal for one-off projects or custom setups.
- Buy exactly what you need
- Retail pricing, no minimum order
- Perpetual licence per workstation
- Motioncube Player included free
- 53 printable code tiles included
Hardware not included — source your own or work with a partner for turnkey installation.
Manage Consents
Control which external services can process your data.
Essential Required
These features are essential for the proper functioning of the website and cannot be disabled.
Anonymous Analytics Required
Required for collecting aggregated statistics that help us understand how users interact with our site. Data is fully anonymous, contains no personal information, and we do not use cookies.
Extended Analytics
Allows analyzing traffic sources (where you came from), marketing campaign parameters (UTM), and navigation paths across subdomains. We use a cookie (7 days) to preserve this data.
External Media
Allows loading content from external services like YouTube or Vimeo.
